How to Apply Eyeshadow: A Beginner’s Guide to Flawless Eye Looks


Dahvi Shira
We get it, eyeshadow can be intimidating. There’s an infinite number of colors to choose from; a million eyeshadow brushes; and jargon like “cut crease” and “smoky eye” to make matters even trickier. And then you have eye shapes and skin types like hooded eyes and mature skin. It can all seem quite complicated. But here’s the thing—that’s also what makes eyeshadow so fun.
Once you know how to apply eyeshadow and have the basics behind you, the options are endless. And thanks to color-coordinated eyeshadow palettes that do the work for you, our guide to makeup brushes (more on that below), and a few beginner-friendly tricks, creating any look you want is easier than ever.
To make it all even easier, we spoke to three experts to share tips on how to apply eyeshadow like a pro. These makeup artists break down how to create the ultimate eyeshadow look with an easy-to-follow tutorial you’ll master in no time. Keep reading to level up your eyeshadow game.
It's about glam time you treated yourself.
Join IPSY

MEET THE EXPERT
Tai Young is a Los Angeles–based makeup artist and founder of Tai Young Beauty makeup brushes.
Michael Ashton is a celebrity makeup artist and groomer.
Jeannie Giannone is a Los Angeles–based makeup artist.
Invest in Eye Makeup Brushes
To get you started, here are a handful of brushes you can use to build your beginner eyeshadow application kit. “The right tools make any job easier, and great makeup brushes are no different,” says makeup artist Michael Ashton. “A small—but well-curated—collection of brushes will really help elevate your eyeshadow game.” Here are the four makeup brushes you need to help you achieve any look.
A Fluffy Domed Brush: This multitasker is amazing for covering your entire lid quickly with color and blending things out. The WINGEME COSMETICS All Over Eyeshadow Brush has soft, synthetic bristles that blend and build color with minimal fallout.
A Smaller Tapered Blending Brush: Use this tool for blending colors into your crease (aka where your eyelid meets your eye socket) to create more definition. Try OFRA COSMETICS Brush #21 - Blending Brush for its multitasking, precise capabilities.
An Angled Blending Brush: This unique tool (we love the REALHER “Make a Difference” Vegan Brush) is ideal for getting into and blending any hard-to-reach areas, like the outer or inner corners of your eye and even along your lower lash line.
A Stiff Angled Eyeliner Brush: These precision brushes, like what’s included in the MORPHE Eye Got This Collection, can be used to define and emphasize your lash line. You can even use them to fill in your eyebrows with a matte shadow a few shades lighter than your brow hairs. This little assortment is great because it offers a few additional options to play around with once you master your stiff angled brush.
A Flat Shader Brush: A small flat brush is the perfect tool to place eyeshadow on your eyelids and blend out any liner. Try the WINGME COSMETICS Mega Shading Brush 13.
How to Apply Eyeshadow Like a Pro
Step 1. Prep Your Lids
Primer isn’t just for the face. Priming your eyes (whether by way of actual eye primer or a powder) helps your eyeshadow last longer by preventing it from sliding off your eyelids. Whether you use an eyeshadow primer or not depends on what you want your final look to be. “Primer aids in eyeshadow color opacity and staying power,” says makeup artist Tai Young. “If you're going for a light wash of the color, it's not necessary.”
Eyeshadow primer may also be necessary if you have oily lids. Some eye primers not only control oil but also have added ingredients (like pearl powder) to brighten and intensify your eyeshadow.
You’ll want to apply your favorite eyeshadow primer using your ring finger. Your ring finger is the best for applying eye makeup because it has the lightest touch and therefore less likely to irritate your skin (plus, the heat from your fingers helps melt the primer in). Gently sweep the primer across your entire eyelid, up to your eyebrow, around the inner corner of your eye where your tear duct is, and even along your lower lash line for stay-all-day wear.
Step 2. Apply a Base Color
Most eyeshadow looks can easily be created with four shades: a neutral shade for your lid, a medium shade for your crease, a dark shade for your outer corner, and a light shade to highlight your inner corner and brow bone.
No matter what makeup look you're going for, your first layer of eyeshadow will most likely always be a neutral shade swept all the way across your eyelid with your fluffy blending brush. You can choose a color close to your skin tone for natural looks, a lighter shimmer for sparkly styles, or go darker for smoky eyes.
Not sure which eyeshadow to reach for? An eyeshadow palette like the TARTE™ Maneater Nightfall Eyeshadow Palette offers an array of neutrals that flatter every skin tone.
You can also choose your eyeshadow shades based on your eye color. Green, gold, purple, and gray shades can help brown eyes pop, while colors like red, yellow, orange, and purple make blue eyes sparkle. For green eyes, try playing around with red, yellow, purple, and gray shades.
You can also skip primer and apply a cream shadow as your base. “Start by using a [cream] product, blend it out using your fingers, then go back in and use a medium-sized blending brush to buff your eyeshadow of choice over top,” says Ashton. “By layering your eyeshadow over a base, you’ll get maximum color payoff, product performance, and your eye makeup will last the distance without needing any touch-ups.”
Step 3. Add Dimension in Your Crease
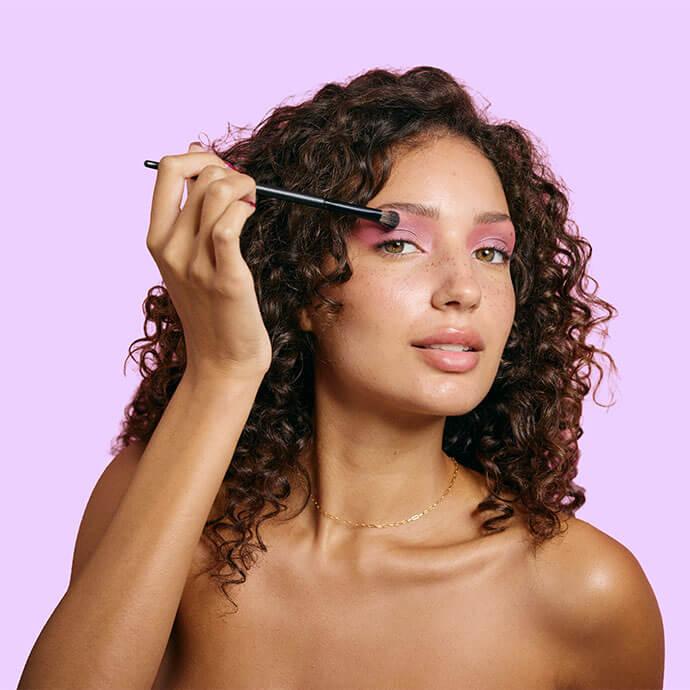
Defining your crease will make your eyes look wider and bigger overall. “You can define your crease by going heavier with a color that's darker than what you used on your lid,” says Young. For a natural look, dip your fluffy or angled crease brush into your medium eyeshadow shade. Then, close your eye and apply the eyeshadow along where your eyelid meets your brow bone, creating a wash of color (as opposed to a thin, hard line).
If you have deep-set or hooded eyelids, you can apply the crease shade with your eyes open to see where it'll be most visible—likely above your actual eyelid on the lower brow bone. To define your eye shape even further, dip your angled brush in your dark shade and use it to define the outer corner of your crease, making a V-shape from the lash line to the outer crease. Pro tip: Keep a light hand as you apply your pigment. It's always easier to add more color than it is to remove it.
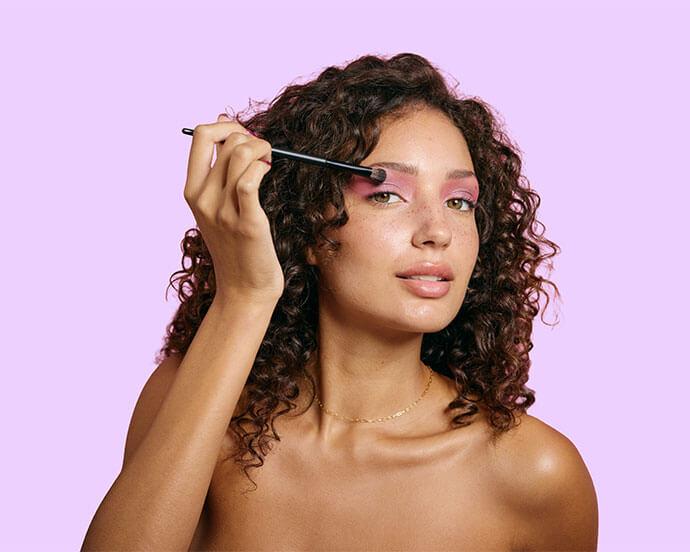
Step 4. Blend With Precision
Blending is one of the most important steps when applying eyeshadow. The technique helps to “marry as many colors together without being able to see where they start or stop,” says Young. “Think of a watercolor painting and how each color flows into the next.” If at this point your eyes are looking more painted-on than perfectly blended, don't worry: This is where those extra blending brushes come in.
Use a clean blending brush to diffuse the shades on your crease and outer V until they blend seamlessly into your lid. If you end up over-blending some of the medium or dark pigment, no worries. Just use your original crease brush to press some more shadow in, then continue to blend.
If you’re having a hard time diffusing the colors, makeup artist Jeannie Giannone recommends using translucent powder on your fluffy brush to blend out any hard lines from the eyeshadow. You can also use a matte eyeshadow the same color as your skin on the same fluffy brush (make sure to wipe off previous product onto a towel), and buff that color onto the brow bone. “This will help to blend out the transition of color on the lid even more,” says Giannone.
Step 5. Define Your Lash Lines
Once your shadow is blended to perfection, you can go in and define your lash line. If you want, go in with a liquid eyeliner or pencil eyeliner first. You can either stop at the end of your eyelashes or build a winged liner look, whichever look you prefer. Then, dip your angled eyeliner brush in the medium or dark eyeshadow (whichever matches your eyeliner color), and use it to set your eyeliner.
Don't want to use eyeliner? Simply dip your angled eyeliner brush into your medium or dark eyeshadow color, and sweep across your upper and lower lash line to create a soft, smoked-out line.
Step 6. Add Highlight to the Corners
The finishing step is to use your lightest eyeshadow and make your eyes pop. “A highlight under the brow is nice to pop the brows from the eyeshadow,” says Young. “Some people even place a little highlight in the inner corners to wake up a tired eye.”
In general, a light matte eyeshadow will give you a fresh, natural look perfect for daytime. For more drama, use a shade with some shimmer. You can also use your favorite cheek highlighter for megawatt shine. The LUNA MAGIC Highlighter always gives us the perfect pop without getting all over the place.
Whichever shade you decide to use, you'll want to apply it along your brow bone (just below the arch of your eyebrow) to give your face a wide-awake and lifted look. To implement Young’s idea, you can also fake a full night's rest by dotting it along the inner corners of your eyes. Both of these techniques will make your eyes look bigger, brighter, and more alert.
Finish with a couple coats of mascara, and don’t forget to fill in your eyebrows (this step makes a big difference in the balance of your makeup look). Give your glam one final look to make sure any harsh edges are blended, and that's it—your eyeshadow is done.
5 Common Eyeshadow Mistakes to Avoid
1. Using Eyeshadow With Minimal Pigment
Many shadows may appear in fun, vibrant shades, but that doesn’t mean they’ll have color payoff once they hit the skin. Before diving into a shade, be sure to do a swatch test on your wrist, or even see if it applies more pigmented once it’s wet. If trying to retrieve noticeable pigment is causing you to hit pan, it’s time to retire the shade (or leave it at the store).
2. Using the Wrong Brushes
Above, we really honed in on the importance of diversifying your eyeshadow brush collection—but we need to say it here: Using an eyeshadow brush designed for something else can make your look go haywire. Not all brushes are created equal, so stick to their intended use.
3. Not Cleaning Your Brushes Regularly
We harp on brush cleaning as a means to avoid spreading germs, but when it comes to makeup application, the more gunk lingering on the brush, the worse your eyeshadow application and blendability can be. If you notice you’re using the right brushes and the right pigments, but still not getting the desired outcome, give your brushes a fresh cleanse to see if that makes a difference.
4. Not Setting Your Look
Much like your face, your eye makeup needs to be set into place as well. Especially given oily lids or general movement throughout the day, it’s easy for makeup to fall out of place. We recommend the MORPHE Continuous Prep & Set Mist+, which you can use before and after your eye makeup application (or makeup application, period).
5. Layering Eyeshadows That Don’t Blend Well
There’s a reason so many shadows are sold in palettes. In addition to providing inspo for layering different looks, they also offer a group of colors that will blend together effortlessly, thanks to their identical formulas. While you may have a variety of luxe shadows from different brands, if they’re not the same, you risk them not blending properly.
Final Thoughts
The best eyeshadow techniques start with the right makeup brushes. Investing in a strong set isn’t just to feel fancy—they really make a difference in how your eye makeup pans out. It’s less about buying the most expensive brushes on the block, and more about investing in the brushes you’ll need to take your look to the next level. Even if you’re not a big eyeshadow enthusiast who cares about following a step-by-step eyeshadow tutorial, snagging a few brushes and high-quality shadow will give you a head start on your beginner’s journey. Want to know more about the best makeup products and practices? Check out our IPSY Shop and IPSY YouTube channel.
Liked this post? Share!
Related Stories
How-To
Got a Cut on Your Face? Here’s How to Help It Heal Without Scarring
Published on Mar 20, 2026 • 4 min read
How-To
Why Everyone’s Scent Stacking Right Now
Published on Feb 27, 2026 • 4 min read


How-To
How to Treat Yourself: 39 Simple Self-Care Ideas
Published on Feb 3, 2026 • 15 min read


How-To
Here’s How to Build Your Perfect Skincare Routine for Both Morning and Night
Published on Jul 22, 2024

How-To
10 DIY Face Masks That Are Expert-Approved & Actually Work
Published on Nov 22, 2022


How-To
How to Give Yourself a Salon-Worthy Facial At Home
Published on Jan 15, 2025 • 10 min read


How-To
These 8 Self-Tanner Hacks Will Keep You Glowing All Summer Long
Published on Feb 2, 2026 • 5 min read


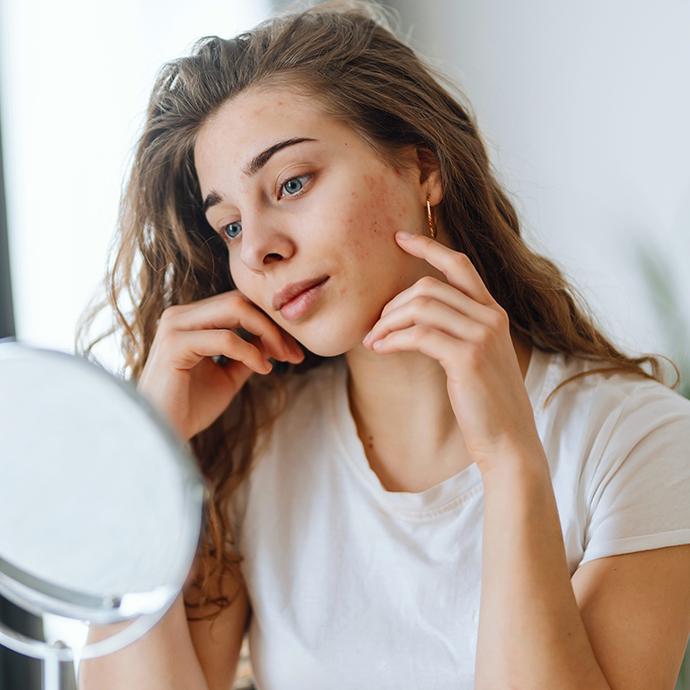
How-To
How to Safely Pop a Pimple (If You Absolutely Have To)
Published on Jul 23, 2024

Beauty Picked Just for You
Get 5 products worth up to $70
Exclusive access to epic deals up to 80% off
Starting at just $15/month. Cancel anytime.