Everything You’ve Ever Wanted to Know About Mastering the Art of Bronzer


Brittany Leitner


If you’ve ever looked in the mirror and noticed your makeup seemed a little…off, it could be because you haven’t sculpted and defined your face. And one of the best ways to do that in a flash is by adding a bit of bronzer.
Bronzer is a multitasking makeup product that truly does it all. Whether it’s a matte formula or something laced with shimmer, bronzer has the power to sculpt our jawlines, lift our cheekbones, and define our features in a way that can only be described as pure wow. Plus, it instantly gives us that just-stepped-off-the-beach glow (no passport needed).
This guide will cover everything you need to know about choosing the right bronzer for your skin type to mastering MUA-approved techniques and tricks. (P.S. Check out our list of the best bronzers based on Ipster reviews.)
It's about glam time you treated yourself.
Join IPSY

MEET THE EXPERT
Maria Ortega is a professional makeup artist based in New York City.
Georgina Graham is a London-based celeb makeup artist who has worked on notable faces like Jennifer Lopez, Alexa Chung, Florence Welch, and Naomi Campbell.
Kendal Fedail is a Los Angeles–based celebrity makeup artist and content creator with a roster of clients including Nicola Peltz-Beckham, Dove Cameron, Ava Michelle, and more
What Is Bronzer and Why Use It?
First let’s get into what bronzing actually is and why you should consider adopting a bronzing technique into your everyday makeup routine. Essentially, bronzer is a makeup item that’s meant to warm up your natural skin tone by giving it a sun-kissed look, which can be all over your face or in a few key areas for dimension. Bronzing and contouring may be used interchangeably, but there are a few key differences.
So, like contouring, it can be used to enhance the natural structure of your face, or it can be used all-over for a sunkissed glow. We love that if you don’t have time for a full face beat, using a bronze on the cheek bones and temples acts very similar to a contour, but allows you to skip the step.
How to Choose the Right Bronzer
There are four main types of bronzing products: powder, cream, gel, and liquid bronzers. “For a more natural-looking finish, I recommend a cream or gel formula. If you have oily skin or prefer more of a matte finish, use a powder formula instead,” says Los Angeles–based makeup artist Kendal Fedail.” We broke them down below to help you choose yours.
Powder Bronzer: “Powder bronzer is good for all skin types, especially oily skin or combination skin,” says Ortega. “Powder is [also] the fastest and easiest to use when you’re a beginner dabbling with makeup or have only a few minutes in the morning. [They] come in a shimmer finish or a matte finish, so a dry skin type can go for a shimmer finish, while a more oily skin type can opt for a matte bronzer. Normal skin types can go for either.” Personally, we love the JAZMINE BEAUTY Beachside Bronzer. To apply, swirl a powder brush into the bronzing powder and sweep it across your forehead, the bridge of your nose, and the apples of your cheeks for an all-over glow.
Gel or Cream Bronzers: Gel or cream bronzer is great for dry or normal skin types, because it won't settle onto dry patches or flakes (just be sure to apply it before any powders to prevent cakiness). For cream or gel bronzers that come in a compact, use a makeup sponge to dab and blend into skin. If the bronzer comes in a stick form (the LYS BEAUTY No Limits Cream Bronzer Stick is one we always reach for, you can apply it directly from the tube and blend it in with your fingers or a makeup sponge. Ortega adds that gel (and also the liquid bronzers we mention below) are ideal for mixing or layering with other products for a natural finish. “You can apply multiple ways; one is by mixing it in with your foundation, or applying it to your face with fingers and adding foundation over it. You can also opt to apply it over foundation just where you want more glow.”
Liquid Bronzer: These are ideal for those who have dry skin or want a dewy and silky-finish makeup look. Ortega says, “You can apply it with a brush over the face alone or over foundation with a fluffy brush or a kabuki brush.” Simply apply the liquid (try the ICONIC LONDON Sheer Bronze) over your liquid foundation on the apples of your cheeks, your temples, and the bridge of your nose, then blend in circular motions.
“When selecting a bronzer, it's important to not go too dark,” says Ortega. “Ideally it should be about two shades darker than your skin tone and with the same undertone. For example, if you have pink undertones, stay in that family when purchasing a bronzer and it will look most natural. If you have olive or yellow undertones you can go with a neutral or even a warmer tone.”
For dark skin tones, we love CIATÉ LONDON Brazilian Glow Bronzing Powder in Cocoa Island. Medium skin tones will look radiant with CONTEXT SKIN Matte Bronzer in Speed of Sound. For fair and light skin tones, the pink undertone of PAT McGRATH LABS Skin Fetish: Divine Powder Bronzer in Bronze Dawn is perfection.
Step-by-Step Guide to Applying Bronzer
Step 1: Prep Your Skin
Cleanse and Moisturize: Before you apply contour, bronzer, or any beauty products to your face, it's always a good idea to start with clean, hydrated skin. Wash your face using your go-to cleanser, then make sure to apply a moisturizer all over your skin.
Layer on Skincare: For the rest of your skincare, Georgina Graham, a London-based makeup artist, recommends the lasagna technique. “My makeup technique is all about building individual layers and letting the products you are working with sink in for a minute or two,” she tells us. “I massage skin with a little oil and/or moisturizer, then leave that to sink into the skin. After a few minutes, blot the skin with a tissue to remove the excess, apply foundation and conceal any imperfections. Then, let that sink in, and blot the skin with a tissue again.”
Apply Primer: Primer not only keeps your makeup in place, but also helps create a smooth base for blending (not sure which primer to pick? We help you choose here). After primer, apply your foundation and concealer as usual, and you’re ready to start bronzing!
Step 2: Choose the Right Brush or Tool
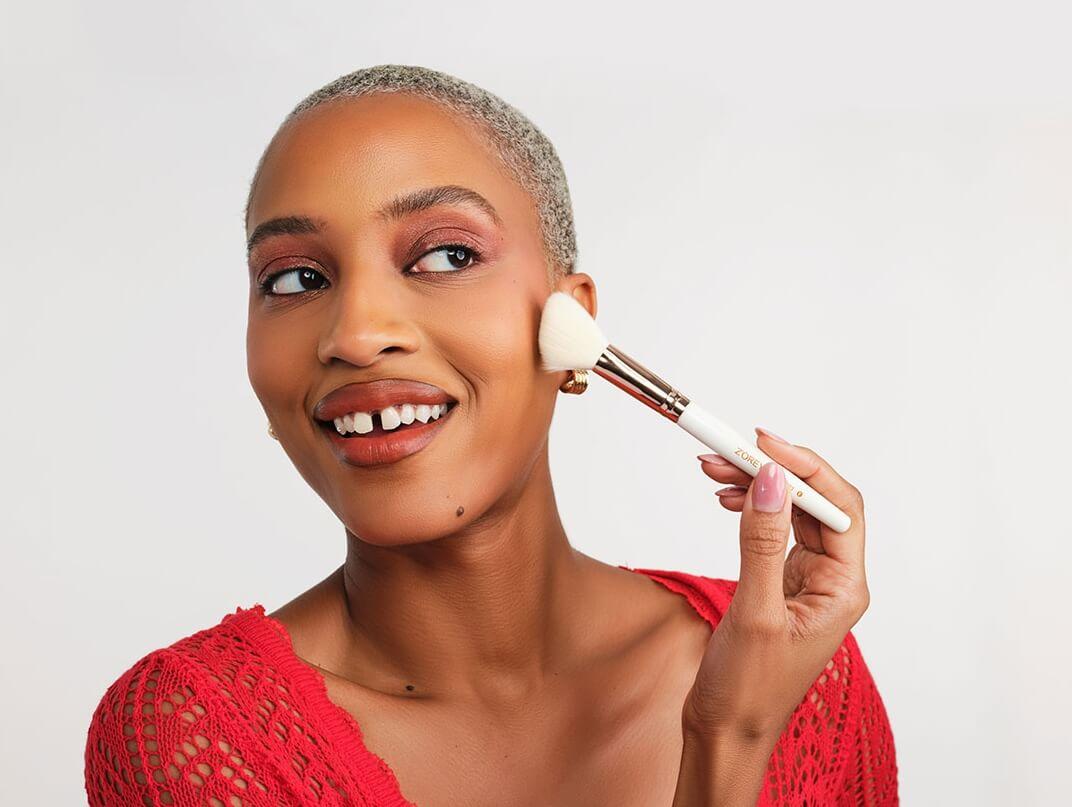
If you’re using a powder bronzer, you’ll need a fluffy brush to apply it correctly without it looking patchy on the skin. Most brushes will clearly label their use when you’re buying one; just make sure to note whether it’s for cream or powder bronzers, and pick the one that best suits your needs.
Step 3: Apply Bronzer to Key Areas
We dive into applying bronzer for your specific face shape below, but here’s a tried-and-true technique that never fails.
Create a 3-Shape: Sweep your bronzer brush along your hairline on your forehead, then follow your hairline down to your cheekbones, onto the apple of your cheeks and then back up below your cheekbones. Just remember to blend in sweeping circular motions to avoid any harsh lines or splotches.
Add More Glow: Blend bronzer along the sides and bridge of your nose for an extra dose of sun-kissed brilliance. Tie it all together with a matching blush for a natural, flushed effect.
Blush up for Warmth: “After applying bronzer, use the same makeup brush to apply a touch of blush to the center of the cheeks. Swirl a bit of peach or pink and it’ll blend into the bronzer for a super pretty flush,” says Graham.
Step 4: Blend
Always make sure to blend for a natural finish. If you suspect you have bronzer blindness, try taking a photo of yourself with a flash to see how it looks on camera. You don’t want it to look like there’s a harsh line dividing your bronzer from the rest of your face, but rather, a seamless blend.
Step 5: Set
Using a setting spray is one of the best MUA-approved ways to get your bronzer to stay in place all day. You might also want to do some extra digging on the packaging to see if your bronzer is long-wear, water-resistant, etc. based on your needs.
All Bronzer Is Not Applied Equally: Here’s How to Master It on Different Face Shapes
How to Apply Bronzer to a Heart-Shaped Face:

The widest part of your face is your forehead and the narrowest part is your chin. Blend a matte bronzing powder on your temple and just above the hollow of your cheek. Then, start at the temple and swoop down from your hairline into the hollow of your cheek. Add a small amount on the tip of your chin for an extra kiss of color.
How to Apply Bronzer to a Square-Shaped Face:

This means the length of your face is roughly equal to the width of your face, and you generally have a straight, defined jawline. Sweep a powder bronzer in a “W” shape across the apples of your cheeks and the bridge of your nose, mimicking where the sun would naturally hit.
How to Apply Bronzer to an Oval-Shaped Face:

Usually the length of your face is a bit longer than the width of your face, and you have a rounded jawline. Bronzing for this face shape is pretty simple: Apply a light dusting of your bronzer to the apples of your cheeks, and blend to your hairline.
How to Apply Bronzer to a Rectangle-Shaped Face:

Rectangle-shaped faces are similarly shaped to square-shaped faces. The only difference is that the length of your face is longer than the width. Sweep some matte bronzer along the top of your cheekbones and at the tip of your chin. Finish by applying some bronzer close to your hairline across your forehead, and you're all set for a beautiful, bronzed glow.
How to Apply Bronzer to a Round-Shaped Face:

Usually the widest part of a round face is your cheekbones, while the forehead and chin are narrower. Begin by applying your bronzer on the apples of your cheeks, then sweeping up and out slightly onto your temple, close to your hairline.
Bronzer vs. Contour: What’s the Difference?
Contouring means adding shadows and light to your facial features by blending matte shades darker than your skin tone onto places where natural shadows fall. Contouring is often complemented by adding highlighter (or its less-shimmery cousin, illuminator) to reflect light and add overall dimension.
Bronzing often uses shades warmer than your contour shade. “For adding warmth and a natural glow, you want to add bronzer to the high points on your face that the sun would naturally hit,” says Maria Ortega, a NYC-based makeup artist. You would generally apply bronzer to the cheeks, the temples, across your nose, chin, neck, and also forehead.”
Common Mistakes to Avoid
Remember, blending is your best friend. You always want to start out with a small amount of product and build up as needed. You also want to make sure to choose a shade that’s right for your overall skin tone (scroll up for tips on choosing your shade).
Answering Your FAQs
1. Can I use bronzer without foundation?
Some people prefer skipping foundation to go for a more natural “no makeup” makeup look when wearing bronzer. If foundation feels too heavy for you, you might also like to try a tinted moisturizer that can help even out skin tone without completely covering it up. Remember, the only rule of makeup is that there are no rules. Try experimenting with and without your base foundation to see which look you like best.
2. What’s the best brush for applying bronzer?
The brush you use to apply bronzer will depend on the type of bronzer you use. If you’re using a powder bronzer, a round fluffy brush is better. If you’re applying a cream bronzer or using a draw-on stick bronzer, a more compact brush can help you buff it out and blend it in with the rest of your makeup.
3. How do I make bronzer last all day?
Look for certain phrasing on the packaging of your bronzer, like “all-day wear,” “waterproof,” or “water-resistant.” These types of bronzers will usually get you through a whole day of activities, no matter what you put your skin through. Spraying a setting spray all over your completed makeup look can also help lock things in place. The SHADES BY SHAN The Setting Spray is our fave for all-day makeup security.
Final Thoughts
Bronzing is a great way to contour in a flash, plus add a little warmth to your skin in all the right places. The type of bronzer you choose (powder, liquid, or stick form), should depend on your skin type. From there, you can choose the right shade for you based on your skin tone.
Use our tips and tricks above to get started, and make sure to check out the IPSY Shop to shop for all of the best bronzers worth adding to your routine.
Liked this post? Share!
Related Stories


Try January
Easy Self-Care Tips That Make the Biggest Difference
Published on Jan 16, 2026 • 12 min read


Try January
Meet Try January, the 31-Day Beauty Challenge You’ll Actually Want to Keep
Published on Dec 22, 2025 • 3 min read


Try January
Skincare in 2026 Is All About Working Smarter, Not Harder
Published on Dec 19, 2025 • 7 min read


Try January
2026’s Biggest Makeup Trends Are a Maximalist Dream
Published on Dec 19, 2025 • 8 min read


Try January
Try One of These 12 Skin Tints to Show Off Your Natural Glow
Published on Jan 25, 2025 • 4 min read


Try January
Enter Your Blush Era With These 14 Gorgeous Blushes for Every Skin Tone
Published on Mar 19, 2025 • 3 min read


Try January
Hair Cycling Is TikTok’s Latest Craze—Here’s How to Do It From the Pros!
Published on May 20, 2025 • 4 min read


Try January
Here’s How to Nail TikTok’s “Contrast Theory” Makeup Trend
Published on Dec 14, 2025 • 4 min read


Beauty Picked Just for You
Get 5 products worth up to $70
Plus exclusive access to epic deals up to 80% off
Starting at just $14/month. Cancel anytime.