Blush Sticks 101: How to Apply Them and the Best Blush Sticks to Use


Ashley Locke


Makeup products come and go, but if there’s one everyone is wearing right now, it’s blush. It’s on everyone’s cheeks, sometimes in a subtle shade, and sometimes on display in full blush blindness mode. We’re wearing blush how we want to wear it, and we’re not letting anyone stop us. With this heightened interest in rosy cheeks, we’re trying out all the blush formulas to see what works best. And, well, it seems we’re all favoring blush sticks over powder and liquid blush these days. Why? As beauty and lifestyle content creator Jasmine Adetunji points out, “They provide a different finish to the skin that you can’t get from a powder blush. They look more skin-like and glowy. Next, they’re super easy to use and blend. Blush sticks are very beginner-friendly and easy to control.”
Though they are easy to use and work for almost every makeup look, there are still some makeup tips we can share to make the application process that much easier for you. Below, we walk you through why a blush stick could be right for you, a step-by-step guide on how to apply it, and a list of some of our favorite blush sticks. Keep reading for your complete handbook on blush sticks!
It's about glam time you treated yourself.
Join IPSY

MEET THE EXPERT
Michelle Rostamian has over 15 years of experience in the beauty industry as a writer and content creator.
Jasmine Adetunji is a passionate and skilled beauty and lifestyle content creator who strives for inclusivity in everything she creates.
6 Benefits of Using a Blush Stick
1. They’re Easy to Use
Beauty writer and content creator Michelle Rostamian says that “blush sticks are rising in popularity mainly for their ease of use. While powder blushes require a brush and a more precise application, blush sticks can be applied with fingers.” This makes the product ideal for beginners who don’t quite feel comfortable using other makeup tools just yet.
2. They Travel Well
Because they’re compact and easy to apply, blush sticks travel well for touch-ups on the go. If you want to pump up the pigment, pack one in your bag to dab on some extra blush before going out.
3. They’re Often Multi-Use
Not only can you use them as blush, but some formulas allow for use as a highlighter, lipstick, or eyeshadow. Get inventive with it by finding new ways to use your blush stick as your heart desires.
4. They Create a Fresh-Faced Look
Rostamian says that blush sticks “are especially great for creating a fresh-faced look, because the cream formula is less likely to cling to texture and dry patches.” These days, we want products that make us look fresh and natural, which is what blush sticks do, according to Rostamian. “Blush sticks also fall in line with the skinimalism trend,” she continues.
5. They Work for All Skin Types
Adetunji appreciates that blush sticks work for multiple skin types. Whether you have dry or oily skin, there’s a blush stick that works for what your skin needs.
6. They Use Less Product With More Payoff
Powder blush usually requires a bit more product for higher impact, but a cream blush stick delivers higher pigment with less product. This is another reason Adetunji is a huge fan of cream blush sticks.
How to Apply a Blush Stick, Step by Step
Step 1: Make sure you’re using the right blush stick for your skin type
This isn’t necessarily a step in the blush stick application process, but it is important to ensure you’re using the right blush stick for your skin type. If you have dry skin, use a formula that contains more oils to give moisture and radiance to the skin. Those with oily skin types should reach for a cream blush that has a more matte finish, so their skin doesn’t look overly dewy.
Worried about highlighting enlarged pores? Steer clear of shimmer formulas, as these tend to enhance the pores and draw more attention to imperfections. Finding the right blush stick is like finding the right foundation—it will take a little bit of trial and error to discover the blush formula that’s best for you.
Step 2: Prep Your Skin With Skincare
Once you’ve found the right blush for you, it’s time to prep. The key to a flawless base? Skincare, of course. Follow your normal skincare routine and don’t forget to finish with moisturizer for a foundation that will protect your skin and enhance the appearance of your makeup.
Step 3: Don’t Forget the Primer
Primer is an essential part of any makeup routine, especially when it comes to blush. After your base is set (yes, even after you apply foundation or concealer), prime away. Applying primer to your face before you put on cream blush will allow the blush to last longer throughout the day and ensure it stays as pigmented as when you first put it on.
The ACE BEAUTÉ Hydrating Face Primer is ideal for those with dry skin, while the JAZMINE BEAUTY Coastal Chic Shine Control Primer keeps oil at bay for oily skin types.
Step 4: Prepare Your Blush
A common misconception when it comes to applying cream blush is thinking you can apply it directly to your cheeks. While you technically can, that’s not going to give you the result you want. If you follow any tip in this makeup tutorial, let it be this one. “While it may be tempting, I never recommend applying a blush stick directly onto the face,” says Rostamian. “Most formulas are quite pigmented, and it can be difficult to blend out and create a subtle finish if applied directly onto the skin. Instead, swipe the blush stick onto the back of your hand, then either use your fingers, a synthetic brush, or a beauty sponge to pick up the product and apply.” Rostamian says that your “fingers will give you more control, a brush will give you more pigment, and a beauty sponge will give a more subtle, natural look.”
Step 5: Find the Right Placement
Blush placement ultimately depends on your face shape—which means how you apply your blush stick matters too. Rostamian suggests that round faces “try applying the blush slightly above the apples of your cheeks for a lifted look.” Adetunji agrees, also suggesting round face shapes blend the blush “diagonally toward the temples” to create an elongated look.
For square face shapes, Adetunji says to “apply to the apples of the cheeks, and blend slightly outward.” Rostamian says this will “soften your angles and give the illusion of fuller cheeks.”
“Longer face shapes can apply blush directly on the apples of the cheeks and blend horizontally toward the ears to add width,” says Rostamian of the easy blush application for long face shapes. And if you have an oval face shape, Adetunji says to “apply to the apples of your cheeks and blend slightly upward toward the temples.”
Have a diamond face shape? “Apply to the tops of your cheekbones, toward the temples,” to balance out your face features, says Adetunji.
Finally, heart-shaped faces should “apply blush to the outer apples of the cheeks and blend toward the middle of the cheek” to accentuate your cheekbones, according to Adetunji.
Step 6: Blend, Blend, Blend
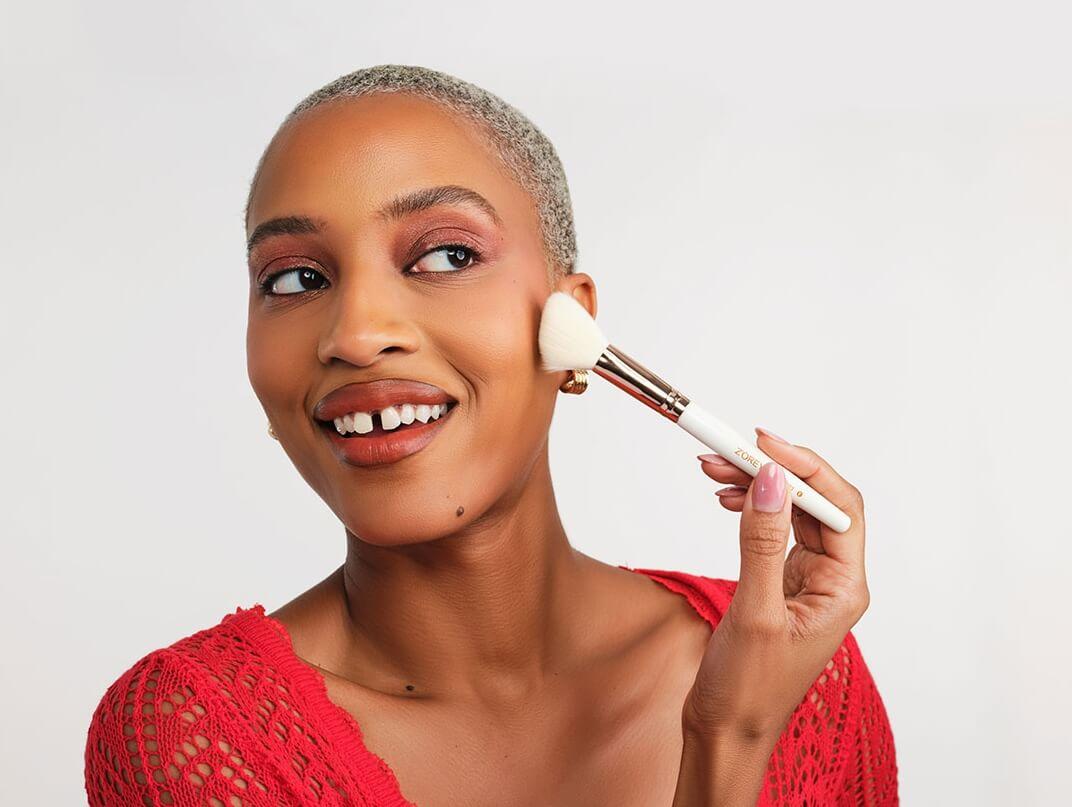
You can use your fingers (make sure they’re clean, please!), a damp beauty sponge, or a blush brush to blend the blush onto your complexion. You’ll want to dab it on, almost like a stamping motion, moving upward toward the temples for a more natural finish.
The ALAMAR COSMETICS Cheek Perfecting Brush is our fave brush because it contours your cheekbones like no other. For a beauty sponge, the M.I.A BY MASSIEL M.I.Artist Blending Sponge is the perfect one to keep in your makeup bag because it delivers a streak-free finish, no matter if you use it with cream, powder, or liquid products.
Step 7: Add More Blush
The step is more of an as-needed option if you want to add more color to your complexion after initial application. Go ahead and follow the steps above to add a pop of color to your cheeks if you feel you need it.
Step 8: Mix in a Milky Toner for Added Glow
Want to look extra dewy? Rostamian recommends mixing a milky toner with your blush. “For a little bit of added glow, I love adding a drop of a milky toner to the blush stick while it's on the back of my hand. This gives the most ethereal, glowy-but-not-overdone finish to the skin.” Try using the PIXI BEAUTY Hydrating Milky Lotion with your preferred blush to give this makeup hack a try.
Step 9: Go Over the Cream Blush With a Powder Blush
Adding a powder blush on top of your cream will help set the look, as well as add more dimension and pigment. “If you want to maintain a dewy finish, use a light amount of powder blush in the same shade,” says Adetunji. “If you want a matte finish, use a loose setting powder and powder blush of the same shade as the stick.”
Step 10: Apply Under-Eye Concealer After Your Blush
You may want to cover those dark circles immediately, but Rostamian says to hold off on applying under-eye concealer until after you’ve applied your blush. “This way, if I overapplied the blush, if it's looking too bright, or if there's a harsh line, I can blend whatever residual under-eye concealer I have on my under eyes downward onto the blush, and it instantly softens everything up.”
Step 11: Set the Blush Look
If you haven’t already, you can set the look by adding a powder blush or loose setting powder over the cream blush. Otherwise, you can opt for a setting spray like the E.L.F. COSMETICS Power Grip Dewy Setting Spray to ensure your makeup stays put through anything. “You can also spritz setting spray onto a beauty sponge and gently press this on top of the blush stick,” says Rostamian. “I often do this when I want to set and soften the color of the blush” to create a natural blush look.
Blush Stick vs. Powder Blush: What’s the Difference?
The Textures: One major difference (that you’re likely already aware of) is the textures. Blush sticks are a cream, whereas powders are, well, powders.
Who They’re Best For: While there is a blush stick for every skin type, Rostamian says “powder blush is best for oily or combination skin because its dry texture can help control shine.” She says that “blush sticks are better for people with dry, mature, or normal skin because they add hydration and smooth over texture.”
The Application Process: “Blush sticks can be applied with fingers, a brush, or a sponge, while powder blushes require a fluffy brush and a little finesse,” says Rostamian of the application process.
The Pigmentation Payoff: Cream blushes are highly pigmented, leaving behind a higher color payoff. Powder blushes aren’t quite as pigmented, so the color payoff isn’t as impactful.
The Finish: “Blush sticks have a creamy texture that melts into the skin for a more radiant finish, while powder blushes have a dry texture that's better for a matte, satin, or soft-focus finish,” says Rostamian.
8 Best Blush Sticks to Try
1. PURLISSE BEAUTY Blush Glow BB Cheek + Lip

A two-in-one lip and cheek tint infused with hydrating vitamin E and hyaluronic acid, this blush stick delivers a buildable pop of color that leaves your skin looking dewy and soft. One Ipster raves about the versatility of this product, noting that they “even used it on [their] eyes in a pinch.” We love a multi-use makeup product.
2. MISCHO BEAUTY Blush Stick

Looking for a cream blush stick that delivers a flush of color in a dewy, radiant finish? This is the one. Ipsters rave about how easy this blush is to apply, with one noting that a little goes a long way. Another recommends depositing the product on the back of your hand first, then picking it up with a blush brush like the BYOD Blush Brush to deposit it onto your cheekbones.
3. TOUCH IN SOL Pretty Filter In My Heart Stick Blush

With its adorable heart shape, this blush stick dabs easily onto the apples of your cheeks for the ideal placement, no matter your face shape. The natural hue this blush provides lasts all day, so you don’t have to worry about it fading from day to night.
4. F.A.R.A.H Creamy Malai Blush Stick

In this formula, rosehip oil, vitamin E, and vegan collagen nourish and hydrate your cheeks, leaving your skin looking radiant and dewy all day long. Plus, the pigment payoff doesn’t fade either. Our Ipsters love the buttery, creamy feel this blush provides when gliding over their cheekbones. It’s also buildable and blendable, so you can dab on as much or as little as you like without it getting cakey.
5. TRÈSTIQUE Blush Stick + Brush

A cream blush on one side and a blush brush on the other? We’re in. This pocket-size blush stick delivers a naturally glowing luminosity that can transition from a sheer tint of color to a creamy flush in a few swipes.
6. JUST XIMENA The 3-In-1 Stick

Another multi-use blush product, this three-in-one stick is a blush, highlighter, and lipstick all rolled into one. One Ipster shares how they used this product to create a no-makeup makeup look. They share, “I put it on my cheeks by using a flat top foundation brush to blend it upward. It's very blendable with or without foundation under, and looks both vibrant and natural all at the same time. After using it for blush, I put a couple of dabs on my lips. Doing those two things, along with brow pencil and mascara, and you have a great no-makeup makeup look.”
7. NUDESTIX Nudies Matte All Over Face Blush Color

Achieving the sunburn blush trend has never been easier. “It gives a great coral lip if put on lightly and a nice sunburn flush for fair-skinned ladies like me,” shares one Ipster. We love how long-lasting the shade is, with the matte coverage not budging even without setting spray.
8. LAURA GELLER Italian Marble Blush Stick in D'oro Berry

The innovative marbleized formula creates dimension for fuller, lifted-looking cheeks, in addition to leaving behind a rosy glow on every skin tone. The application is also super easy, especially for beginners. Swipe it on, dab it in, and your makeup is all set.
Final Tips: Blush Sticks Make Applying Blush Easy
Blush sticks make applying blush easy and accessible for all. When powder and liquid blushes feel intimidating, blush sticks come in to save the day. Always remember to prep your skin with skincare and primer before applying the makeup product—and rather than going in directly, apply it to the back of your hand first so you don’t add too much pigment to your cheeks. Set the look with a powder blush, loose setting powder, setting spray, or a combination of all three. Don’t forget to check out the IPSY Shop to find the right blush stick for your needs.
Liked this post? Share!
Related Stories


Try January
Easy Self-Care Tips That Make the Biggest Difference
Published on Jan 16, 2026 • 12 min read


Try January
Meet Try January, the 31-Day Beauty Challenge You’ll Actually Want to Keep
Published on Dec 22, 2025 • 3 min read


Try January
Skincare in 2026 Is All About Working Smarter, Not Harder
Published on Dec 19, 2025 • 7 min read


Try January
2026’s Biggest Makeup Trends Are a Maximalist Dream
Published on Dec 19, 2025 • 8 min read


Try January
Try One of These 12 Skin Tints to Show Off Your Natural Glow
Published on Jan 25, 2025 • 4 min read


Try January
Enter Your Blush Era With These 14 Gorgeous Blushes for Every Skin Tone
Published on Mar 19, 2025 • 3 min read


Try January
Hair Cycling Is TikTok’s Latest Craze—Here’s How to Do It From the Pros!
Published on May 20, 2025 • 4 min read


Try January
Here’s How to Nail TikTok’s “Contrast Theory” Makeup Trend
Published on Dec 14, 2025 • 4 min read


Beauty Picked Just for You
Get 5 products worth up to $70
Plus exclusive access to epic deals up to 80% off
Starting at just $14/month. Cancel anytime.